# Add Comments
# Native Comments
Native commenting (opens new window) support was introduced in Ghost 5.9.0 and it's supported by the theme from version 3.1.0, this feature allows you to invite members to join the discussion and participate in a community directly on your website.
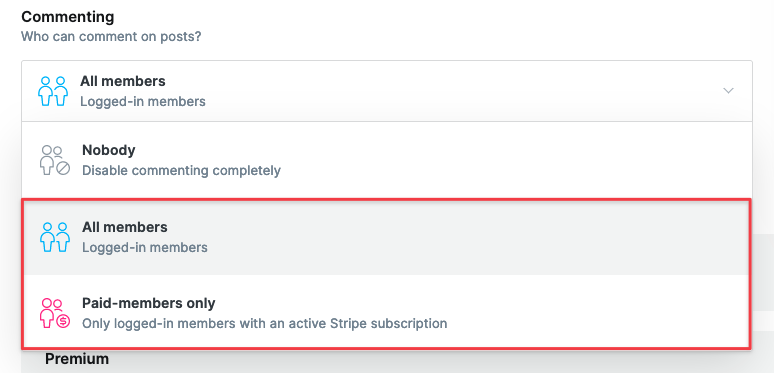
This feature is disabled by default, if you want to use it you have to enable it first, you can do it in the Ghost Admin, under the Membership settings:

If you want to implement anonymous commenting, require other advanced commenting features, keep reading.
# Third-party Comments
Weiss Pro is also compatible with third-party solutions, you can use any of the available Ghost integrations (opens new window), the installation is usually quite simple, below you can see an example of how to add Disqus and Cove comments to your blog. The setup process for other solutions is pretty much the same.
# Disqus
Weiss Pro integrates perfectly with Disqus (opens new window), all you have to do is the following:
After creating an account in Disqus, you have to create a new site in the admin (opens new window) of this platform.
You must copy the shortname of your brand new site, this can be found in the preferences of your site.
Unzip the theme folder.
Open the file
partials/comments.hbswith a text editor and comment out the following lines of code:
{{!--
  <section class="l-comments js-comments">
    <!-- Paste here the provided code snippet -->
  </section>
--}}
- Now replace
<!-- Paste here the provided code snippet -->with this:
<div id="disqus_thread"></div>
<script>
  var disqus_config = function () {
    this.page.url = "{{url absolute="true"}}";
    this.page.identifier = "ghost-{{comment_id}}"
  };
  (function () {
    var d = document, s = d.createElement('script');
    s.src = 'https://CHANGETHIS.disqus.com/embed.js';
    s.setAttribute('data-timestamp', +new Date());
    (d.head || d.body).appendChild(s);
  })();
</script>
- Then look for the following line of code:
s.src = 'https://CHANGE_THIS.disqus.com/embed.js';
Replace CHANGE_THIS with the shortname you got in step 2.
- Finally save the file, zip the theme folder and upload it again.
# Cove
Cove (opens new window) is an alternative comment platform that allows you to embed fully functional comment threads from your subscribed members, allowing you to build a community for your membership audience on Ghost. In other words, Cove lets subscribers of your content log in and comment on your content.
There is an official guide (opens new window) on how to integrate Cove with Ghost, the only difference is step 4 (Add the code to your theme), the difference is that you have open the file partials/comments.hbs and comment out the following lines of code:
{{!--
  <section class="l-comments js-comments">
    <!-- Paste here the provided code snippet -->
  </section>
--}}
And then replace <!-- Paste here the provided code snippet --> with this:
{{#if @labs.members}}
  <h2><span id="cove-count"></span> Comments</h2>
  <div id="cove"></div>

  {{#if @member}}
    <p>Signed in as {{@member.email}} · <a href="javascript:" data-members-signout>Sign out</a></p>
  {{else}}
    <p>Become a {{@site.title}} member below to join the conversation (it's free!). As a member, you will also receive new posts by email (you can unsubscribe at any time).</p>
    <form data-members-form="signin" id="cove-login">
      <input class="cove-input" data-members-email type="email" required="true" placeholder="your@email.com" />
      <button type="submit" class="cove-button">Sign in to comment</button>
      <span class="signin-success" style="display:none">Great! Please check your inbox for a log in link.</span>
      <span class="signin-error" style="display:none">Something didn't work. Please try again.</span>
    </form>
  {{/if}}

  <script>
  const Cove = {
    publication: "your_site_id",
    contentId: "{{id}}",
    memberId: "{{@member.uuid}}",
    memberEmail: "{{@member.email}}"
  }
  </script>
{{/if}}
Finally save the file, zip the theme folder and upload it again.
For more detailed info please refer to their official documentation (opens new window).
WARNING
To install Cove you need to enable first the Members feature in the Ghost Admin, including setting up the email system.